
Different Renders
Here are some of the renders I done for the final scene.
As the program was really slow to use with the amount of assets I had in the environment I wasn't able to create as many renders as I would have liked. I was going to add more lights and experiment with a different time of day, however, I didn't really have any other light sources, as lanterns were never made for the environment, meaning I had to stick to a day time setting.
As the program was really slow to use with the amount of assets I had in the environment I wasn't able to create as many renders as I would have liked. I was going to add more lights and experiment with a different time of day, however, I didn't really have any other light sources, as lanterns were never made for the environment, meaning I had to stick to a day time setting.

3DSMax Scene. Ready for Marmoset!
Here is the 3DSMax scene I have been working on.
I have imported all my assets into this scene and then placed all the abjects where I wanted them, this would be usually done in a game engine, but as I mentioned a few posts back I won't be able to use a game engine especially at this point. I thought I would assemble the scene in Marmoset, however, that wasn't the easiest option, as Marmoset becomes a very slow program to use if lots of assets are imported and duplicated. It is very difficult to place objects too, as there is no snap to grid feature or snap to vertex. Therefore I assembled the assets in 3DSMax as this was the easiest option.
I was also going to export all the assets as an FBX and try import the textures along with the assets, but this didn't work, because once the assets were import into Marmoset, the assets all seem to move out of place, messing up the environment. In the end I just had to re-import all the textures into Marmoset and apply the materials to the corresponding assets.

Final Tree and Rock assets
These are the final models and textures for the Rock and Tree assets.
Not as much time as I would have liked has been spent on these and my lack of experience in tree modeling really shows with the tree asset. I had researched different ways to model the tree in 3DSMax and most of them are rather time consuming, I managed to create something that looks ok, but not to the standard I would have liked.
The rocks however, are looking rather good considering the time I had put into them. This was because I had already made a few rock like assets for my AGD module and Had some experience in creating rocks within Zbrush, this has help to speed up the creation for the rocks. I also think that the texture looks quite good, I used colours referenced from Tomb Raider and also a few picture I got from a texturing website called CG textures. This site has been my primary source for texture and has been a great help throughout this project.
I may try and create some plant assets. However time is really short now and I need to get all my assets into Marmoset and place these rock many many times.

Rocks
I have managed to make 10 rocks that I will be able to re-use over and over in my environment to fill it out a bit.
I made all these rocks by exporting out a cube from 3DSMax to Zrush and then sculpting it 10 times to get different variations. I then used decimation master to create the low poly models. I will get the detail from the high poly sculpts with Xnormal.
I have UVmapped them but I still need to texture them, I will try to keep them all on one texture sheet, but if the textures look too low rez I made end up slitting them on two.
Grass
So I have been trying to create some grass for my environment.
This is the first time I have attempted grass and vegetation in general is an area that I have very little experience in. However for my first attempt I think this went well.
The bright green grass was made for testing and I have this in my scene, that was in the last post.
The shorter dark green grass will be what I will be using for my actual environment, I think it looks good, but I did have a little problem with the Alpha and how it was displaying the transparency, as its looking a bit fluffy.
The grey dried out grass still needs a bit of work as its a bit blocky and there isn't enough transparent parts.
Main Scene
The main assets have been put into the main scene within marmoset.
Terrain has been created. I decided to make 3 Parts to the terrain and then re-use two of these to make the whole terrain for the environment. The results are ok and the textures are looking acceptable, but I can see the seams where the terrain pieces join together. I will try hide these with the grass meshes I will create in the next week.
The lighting so far is just one directional light and I have used an image of mine as a background, although that may change.
The next task for my environment is just creating as many assets as I can in a week and a half, I will try to create the following:
- 10 Rocks
- 2-4 types of grass patches
- One main tree
- 3-6 variety of plants
- 1-2 secondary assets, such as lanterns
Along with the above I may end up trying to re-use pieces of the building assets for rubble, to clutter the place a bit.
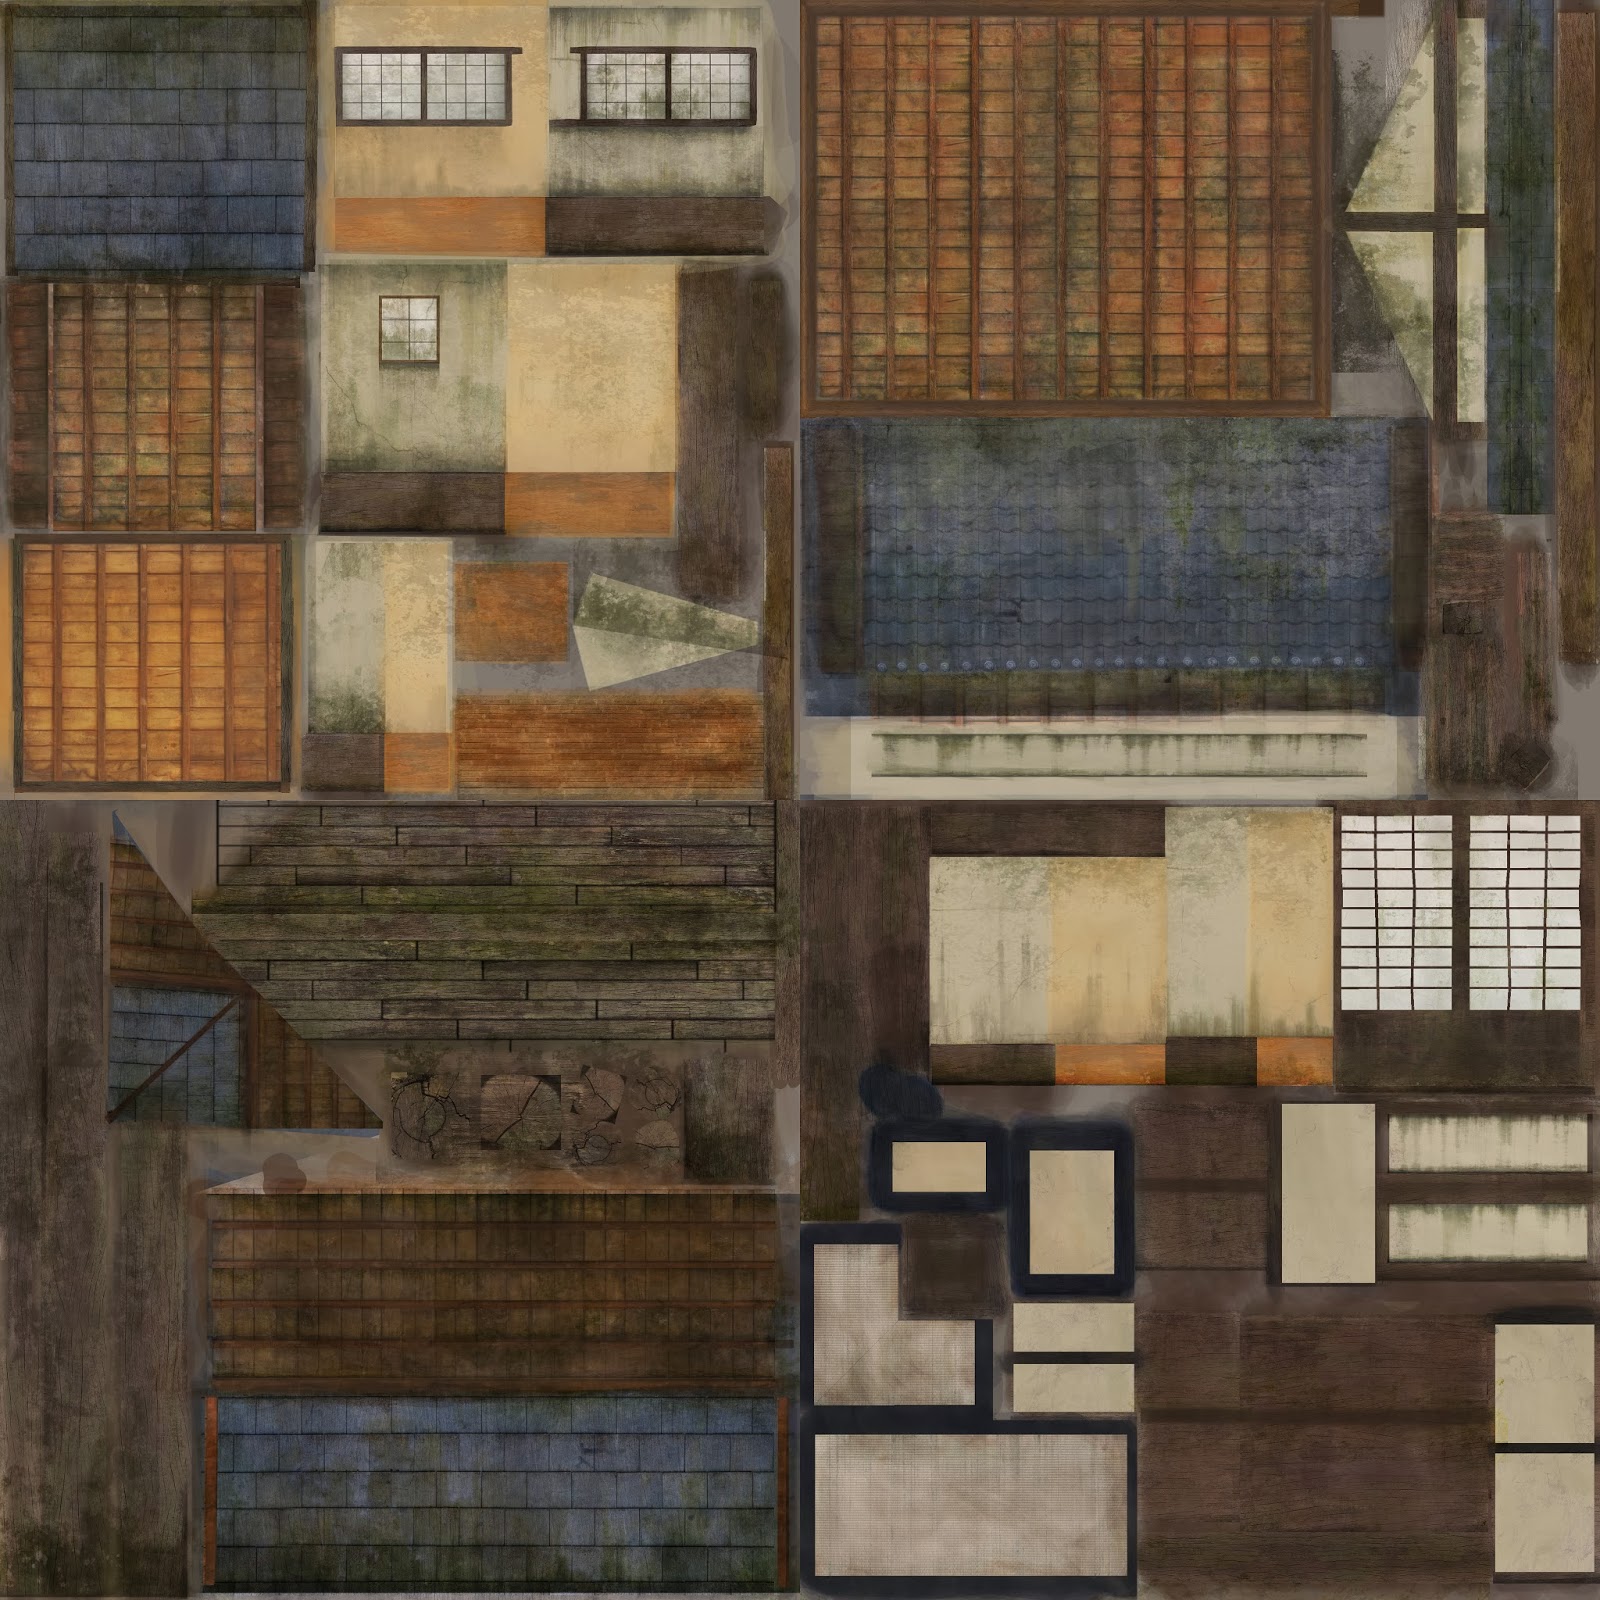
Tea House Building Texture
The Main Tea House Texture is almost done.
I have been working on the texture for 4 days now and I think its just about there.
I hope I haven't gone over the top with the wear and tear/damage/moss stuff.
I really like what I have achieved with the colours, however some of the wood may
be repetitive, but the building is made out of mostly wood so I guess that can't be helped.
I still need to create a normal and specular map for this building, but I will leave that for now and
move onto the secondary assets and terrain so I can start to actually assemble my scene.
Tea building texture:

Gate Texture
So the Texture for the gate is just about there.
I still need to adjust the normals on both the gate and wall, as I think they are too strong.
Also I added some big damage to the wall and I think that it may need toning down a lot
as the wall will be repeated over and over, this will lead to lots of repetition, so the damaged
will stand out and look odd.
I am now going to work on getting the diffuse texture done for the tea house building.
Here is the gate and wall texture together, fully textured:
Wall Texture
After deciding on the texture style I have now been and will continue to texture all the main assets before moving onto making secondary assets.
So far the texturing process is taking longer than I would have liked, but I think I'm getting some good results.
Here is the wall texture in its current state, with normal map:

So far the texturing process is taking longer than I would have liked, but I think I'm getting some good results.
Here is the wall texture in its current state, with normal map:
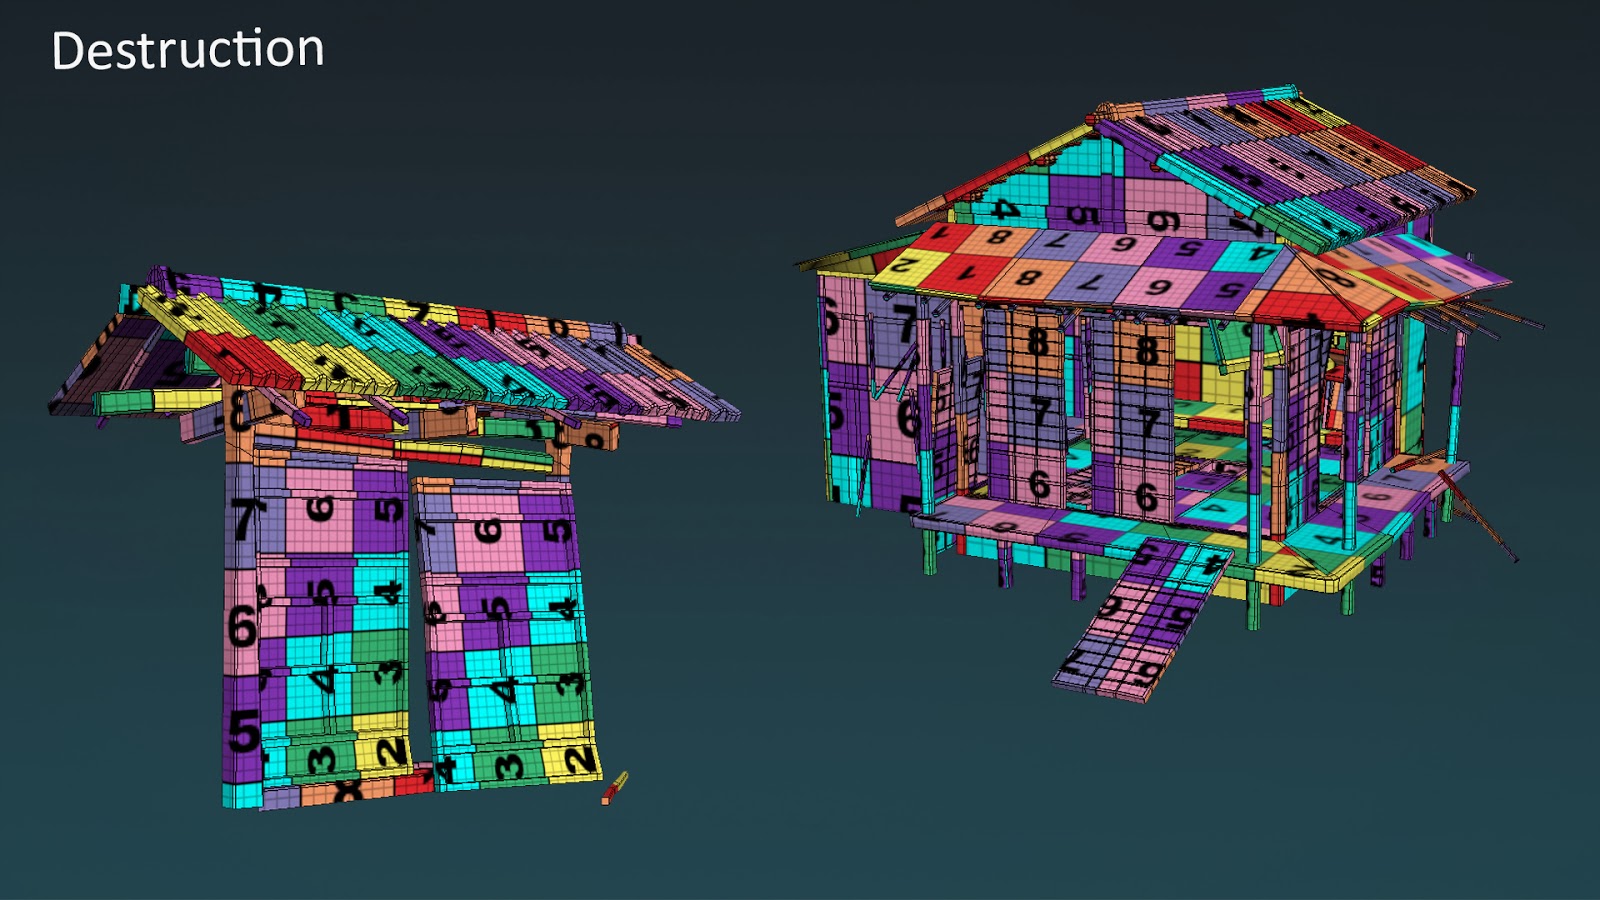
Destruction, UDK problems and New focus.
I then textured the bridge to get it to the standard I what all my assets to be.
However as I mentioned a few posts back, I was modeling everything, then assembling it in 3DSMax, to import "asset chunks" into UDK. This has coursed a big problem, as it will be almost impossible to make good light maps with the chunks.
As Time is short and I can't afford to go back and make light maps for all the pieces of my assets, then reconstruct them or import each individual piece. This means I will no longer be using UDK to place my assets in, instead I will use Marmoset Toolbag 2.
Marmoset doesn't require light maps and the lighting within the program is very powerful and I think this will be a great, time saving option.
Obviously Marmoset isn't a full Game engine, so some parts of my environment will need to be scrapped, however I feel I wouldn't have had time for these anyway.
No longer needed: Moving water, Noises, Assets outside of main environment, Moving Vegetation, Collision.
I am happy for my environment to be a static image and without the ability to walk around, as this means I can focus on textures and getting a good final render.
Below is a couple of broken assets:
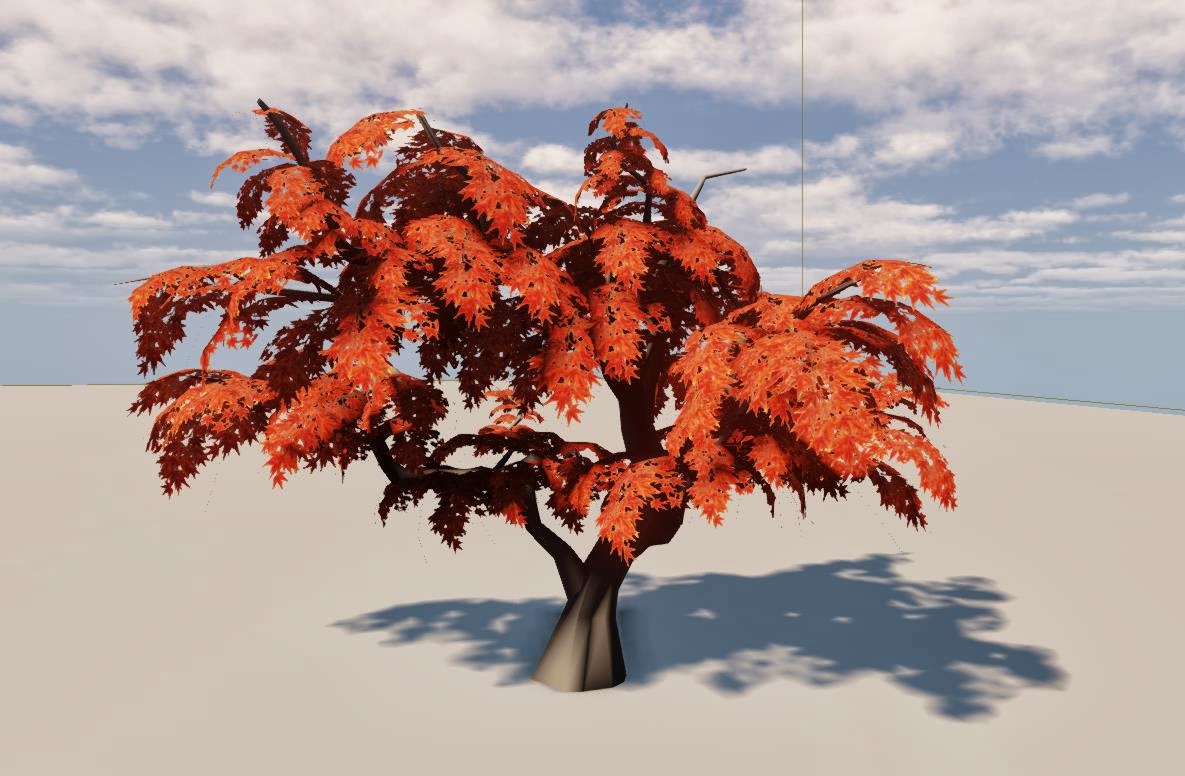
Tree Modeling Options
Below is an example of I tree I tried to create in 3DSMax. It isn't fully textured and so far I would say that it is looking ok, with a bit of tweaking and some time texturing I think it could look good. But it has taken me a long time to get it to the point its at and I have a lot more to do than one tree.
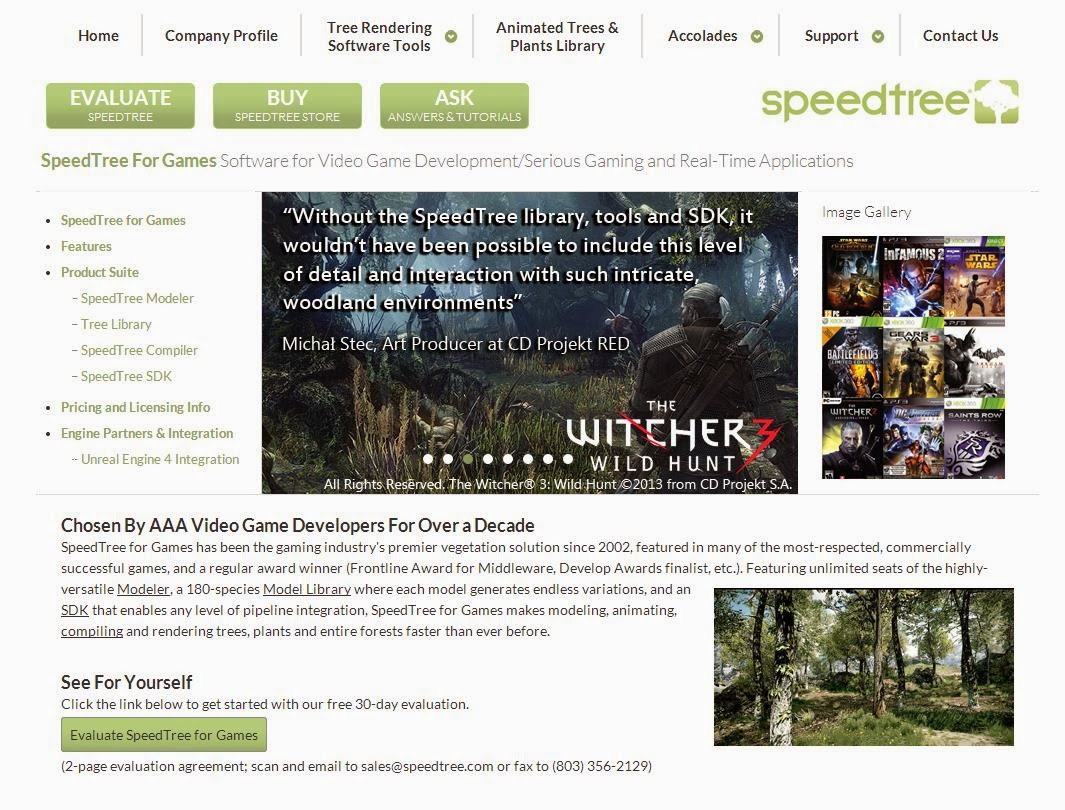
Therefore I have been looking into Procedural tree modeling and programs that can help me speed up the process. So far I have found a few apps, that I can't use as I don't own any Apple products and also some programs that specialize in creating vegetation for game environments. Unfortunately its difficult to find anything for free and these applications cost a lot of money,
My Tree I created in 3DSMax:
Speed Tree:
Texturing 1
I have almost finished texturing the bridge asset.
Apart from small details and maybe adding some moss to the texture, I would say I am almost there with the bridge texture. This now sets the standard for all my other textures and gives me an asset to aim at.
I spent a lot of time on this texture, making sure that I get in as much colour variation as I could and making sure that the texture wasn't just a base colour with a picture on top, as this looks boring.
As mentioned before in a previous blog post, I stated that I would reference from the newest Tomb Raider game and I have been looking at the assets featured in that game and aimed for a very similar style. I hope that my asset looks like it could fit within that universe.
Bridge Texture Progress:
Detailing Main Assets
I have finished modeling the main assets for the environment. This includes the following:
Tea house building,
Wall asset,
Bridge,
Entrance pieces.
I have unwrapped all these assets and they are now ready for texturing. It has taken a lot longer than expected to get these assets modeled and unwrapped, as I spent a lot of time on other modules and have rarely had the time to focus on this project.
From here, I will fully texture the bridge asset and bring it up to a "Final" standard that I will base the rest of the texturing on, therefore, the bridge asset will likely take four to five days to texture, to make sure that I get the colours correct and the level of detail I'm aiming for.
I will be using the latest Tomb Raider game for reference, looking at the colours used and how much texture detail they have manage to put into their textures. The assets in Tomb Raider look rather damaged/worn too and I may include this within my textures, even though I won't be creating damaged assets.
Block out Progress 2
I have been working on blocking out all
the main assets in my environment, this will include the
following:
Tea house, Outside wall, Entrance, Big trees.
Once all these assets are blocked out I can work on detailing them, starting with the Tea house.
Originally, I was planning on exporting and importing all individual pieces that made up these structures. However this will take up too much time and I will end up creating a ridiculous amount of files. Therefore I have decided to group assets, for example: (Tea house veranda Group). I will then give this group its own texture sheet and unwrap the assets together and export them out of 3DSMax as a “Chunk”.
I feel this may not be the most optimal approach, however as I haven’t been able to work on my final project as much as I would have liked, this method is faster and I will be able to create and texture assets at a quicker rate.
Bridge Model:
I have finished the Bridge model and added as much detail as I think is needed. I used the method explained above to export and import this asset into Max as one “Chunk” (Called: Bridge Asset).
Th next step for the asset is texturing, but this will be left until I start texturing my main tea house building.
Wall Block out:
The wall for the outside perimeter has been completed with all the necessary basic shapes, all that is needed now is to add the remaining detail and then move onto the UV unwrap.
Entrance Block out:
This asset still needs some extra shapes created to finish the block out. I am also still working out the sizes for this asset.
Here is an image to show the current state of a few of my assets:

Block out Progress 1
So far I have blocked out all the main shapes of the Tea
house building. Next I will block out the rest of the environment.
I will need to block out the following:
Bridge, Wall, Entrance, the pond area, rock area and placement of vegetation, lanterns and rocks.
I will use simple shaped assets to show where I want my trees and rocks.
Once I have blocked out my entire environment, I can create my final asset list.
Here is what I have blocked out so far:

Mood Boards for the Garden and Art Style
Here are
Mood Boards for what I would like my the Garden in my environment to
look like. Also the art style that I am going for.
Garden:This mood Board shows what I would like to include in the garden. I would like to keep my environment as small as possible and get as many assets in this area to keep it as interesting as possible.
Art Style:
My assets will be based of the ones featured in Tomb Raider, in terms of texture quality and style. I will try to push my assets a bit further than Tomb Raider as some of the assets are very low poly in-game.


Mood Board Image Reference:
Books:
Internet
Images:
Mood Boards For the Tea House Building
Here are Mood Boards for what I would like the Tea house
building to look like in my environment.
All of the Images are taken from books and internet
website which are linked below the Mood Boards. These Mood Boards are to help
me visualize what I am trying to create and to get a sense of size. I will also
be able to start writing up an Asset list, basing on what I can see in the
images. From here I can block out the tea house building.

Mood Board Image Reference:
Books:
http://www.amazon.co.uk/Measure-Construction-Japanese-House-Books/dp/0804814929/ref=sr_1_1?ie=UTF8&qid=1383863110&sr=8-1&keywords=Measure+and+Construction+of+the+Japanese+House
http://www.amazon.co.uk/Houses-Gardens-Kyoto-Akihiko-Seki/dp/480531091X/ref=sr_1_1?ie=UTF8&qid=1383863139&sr=8-1&keywords=houses+and+gardens+of+kyoto
http://www.amazon.co.uk/The-Japanese-House-Architecture-Interiors/dp/4805312092/ref=sr_1_8?ie=UTF8&qid=1383863173&sr=8-8&keywords=japanese+house
Internet Images:
http://sasaki-kougyo.com/syumi/cyashitsu19.htm
http://www.kcif.or.jp/HP/rental/syosai/jp/wafu.html
http://tminkaen.org/?page_id=3206
http://cheruprifre.blog.eonet.jp/default/2011/05/
http://www.flickr.com/photos/sereivut/5183488724/sizes/m/in/photostream/
http://www.heiwagokin.co.jp/eng/index.html
http://www.swordsoftheeast.com/browseproducts/Musashi-Japanese-Swords-Asuka-Tanto-(BLUE).HTML
http://blog.goo.ne.jp/kizyoumuhaku/e/bd86cfa6392155dbe999b2eae82ac13f
http://blog.goo.ne.jp/kizyoumuhaku/e/bd86cfa6392155dbe999b2eae82ac13f
Project Specification
For my final Year
Project I will be creating a 3D environment.
The Environment will be based on Japanese architecture as I will be creating a Japanese styled Tea house in a Garden.
The Art style for my Textures and lighting will be influenced by the New Tomb Raider Game (2013) by Crystal Dynamics. My Environment will be mainly produced to the highest quality I can in the time frame given, keeping to the standard of the Tomb Raider Game mentioned above. I would also like to have a visual story told via the assets placed in the environment, as there will be no characters within the scene. So far I have decided that an attempted robbery has taken place. “Someone has tried to steal the Statue inside the tea house. However, they were stopped by someone”. I will try to show this scene by placing the statue half inside a sack and on the floor, to show that it was being stolen. I will place a knife on the table will blood stains on it to show someone has been injured (the robber). A trial of blood will lead outside in the garden and over a wall, to show that they escaped.
The above Specification has been changed:
Update: 20/02/2014
I don't think I will end up creating the "Scene" mentioned in the specification above.
Now I will be focusing on just getting the environment build and lit, as the textures will be inspired by the newest Tomb Raider game I will make all my assets look worn. The environment could be a lost place or somewhere no one lives, however structures and plant life still exists.
The programs I will be using include:
- 3DSmax
- Photoshop
- Zbrush
- Marmoset Tool bag
- Ndo2
- UDK
Primary Aims (Must be completed):
Basic Construction of the interior and exterior,
One room,
Building fully textured,
Garden terrain and main plant assets modelled and textured,
lighting completed,
Sky box.
Secondary Aims (Not Necessary):
A second room,
Small secondary assets,
Secondary assets textured,
Wall around outside of environment,
Artwork on the shoji (paper walls).
Basic Schedule:
October – Asset list, Texture list, Mood Boards, Basic level block out. (End – October 31st)
November – Start of asset creation, detailed level block out.
December – Continue with asset creation. (End – January 31st)
January – Start of texturing, finish remaining assets.
February – Final Textures and import process into UDK. (End – February 28th)
February, March – Level assembly and Lighting, Presentation shots. (End – March 12th)
All Months – Blog posts to help write report. (End – March 15th)
Prepare for hand in – March 16th – March 22nd
Subscribe to:
Posts (Atom)